Creating Databases and Tables in MySQL: A Step-by-Step Guide
Written on
Chapter 1: Introduction to SQL Databases
In this tutorial, we will explore how to set up databases and tables within SQL. These components are fundamental to SQL as they allow for efficient data storage, retrieval, and manipulation. Think of a database as a folder containing various Excel sheets, where each sheet represents a table. Just like an Excel sheet, a table consists of rows and columns that organize data.

For this demonstration, we will utilize MySQL Workbench. If you haven’t installed it yet, I recommend checking out my installation guides for both Mac and Windows. Once you have it set up, return here to proceed.
Section 1.1: Setting Up Your Database
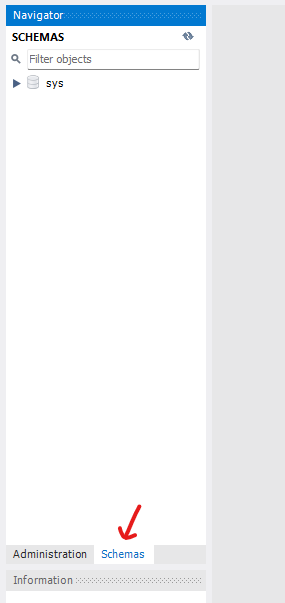
To start, launch MySQL Workbench. In the "Navigator" panel on the sidebar, click on "Schemas" to view your current databases.
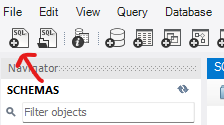
Next, open a new SQL file by clicking on the SQL File button located in the toolbar.
In the opened file, enter the following command to create a database:
CREATE DATABASE school;
For clarity, I will write SQL keywords in uppercase and identifiers in lowercase. Here, "school" is the identifier for our database. Remember to terminate each SQL command with a semicolon, as this is considered best practice.
Now, execute your command by clicking the yellow lightning bolt icon in the toolbar.

Refreshing the schema will allow you to confirm that your database has been successfully created.

Now that our database is set up, you can remove the "CREATE DATABASE" statement from your file. If you run the script again without deleting this command, it will attempt to recreate the database, resulting in an error. Alternatively, you can highlight the code you wish to execute, as shown below:
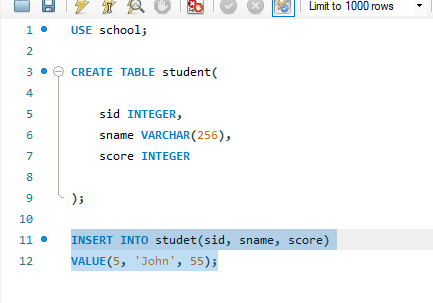
This way, if you execute the file, only the highlighted commands will run.
Section 1.2: Creating Your First Table
Before we create a table, we need to ensure that we are using the correct database. This is done with the following command:
USE school;
Now we can proceed to create our table. Use the "CREATE TABLE" statement followed by the table name and an opening and closing parenthesis:
CREATE TABLE student (
);
Within the parentheses, we define the columns for our student table. For simplicity, we will include three columns: an ID, a name, and a score. Each column also requires a data type. Here’s a breakdown of our choices: the ID will be an "INTEGER," the name will be a "VARCHAR" (a string type), and the score will also be an "INTEGER." The table definition will look something like this:
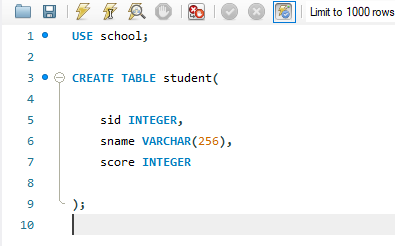
It's important to place a comma after each column declaration except for the last one. The "VARCHAR" data type should also specify the maximum character length it can hold. To accommodate long names without issues, we can set it to 256 characters.
After running your script, you should see the new columns reflected in your table within the sidebar of your database.
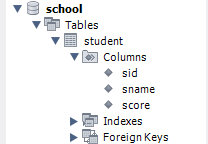
Congratulations! You have successfully created your first database and table, complete with several columns. If you have any questions or need further clarification, please leave your comments below, and I will respond as soon as possible.
Have a wonderful day!
Chapter 2: Practical Video Tutorials
To enhance your learning experience, check out the following video tutorials:
The first video provides an in-depth explanation of how to create databases and tables in MySQL.
The second video walks you through the steps of creating your first database, perfect for beginners.